Photographing the Bear River Migratory Bird Refuge is a passion of mine. Maybe, just maybe, mind you, it could even be termed as a small obsession, of sorts. I don’t know but, all in all, I do spend countless hours on the refuge looking for birds, butterflies, and other interesting scenes in nature to capture with my camera and share with you on this blog.
Over the years and from much trial and error, much, much trial and error I might add, this passion has helped me come up with a handful of simple but useful photography tips. These little tricks, for lack of a better word I suppose, have helped my outdoor photography skills increase while photographing this enchanting slice of nature. Yes, they are very simple suggestions, I will admit, but even so, they have indeed helped me grow as an outdoor photographer over the years.
(Shop Bear River Blogger's Online Store)
(T-shirts, Hoodies, Greeting Cards, Blankets)
Sometimes, I suppose, it’s the simple things that help us the most and oftentimes it is those fundamental things we casually overlook, deeming them not helpful in the least, that could actually assist us more than we could ever imagine. That is for you to decide, however, on this one. I merely offer these tips as suggestions as to what has helped me capture the images you see here on my blog and elsewhere I frequent online.
In no particular order, here are 20 photography tips for photographing the Bear River Migratory Bird Refuge and other similar places you may visit.
Drive slow….backing up never works.
This is quite possibly my most commonly incurred mistake while photographing on the refuge auto tour route. I come across a scene I like but I’m too slow to hit the brake. I am too slow to even make a decision to try and photograph it until I’m past the subject. Honestly, 99 times out of 100 when I stop and back up, it’s too late and the bird has flown off.
Sometimes, I will admit, on slow days I lose focus like this and I stop paying attention as well as I should to the sides of the auto tour loop. By doing so, I oftentimes miss great scenes and almost never get a second chance by stopping and backing up. Yes, backing up almost never works. If something catches your eye, just stop and take the picture.
Bring food and water so you can stay longer
Ok, this isn’t a direct camera-related tip but there have been many days out on the refuge I had no food or water with me, thus forcing my hand to leave long before I wanted to because, I am ashamed to say, I wasn’t prepared for an extended stay.
(Advertisement)

(As an Amazon Associate, I earn from qualifying purchases.)
On a normal day, it takes me about 2 hours or so to drive the auto tour route but on those days when things are just clicking and there seem to be great shots around every turn, I have taken 5 hours or more to drive the loop, especially on days I decide to stay and go around several times.
Having some food and water makes the day so much more enjoyable and productive, allowing you to focus on finding things to photograph instead of being riddled with thirst or hunger.
Expect it to be a great day and prepare for it, food and water-wise. It doesn’t always happen but you’ll be glad you were prepared on those days when nature does cooperate and brings her A-game to the table.
Bring extra batteries and memory cards
This has happened to me more times than I care to remember, especially when I am out photographing sunsets and I think I don’t need to bring all of my gear. Sometimes, in my haste, I just grab my camera and go. I head out the door and forget to check the battery level or if I even have a card in the camera.
I tell you there is nothing more frustrating than having a great scene before you and there is no card in the camera, or it is full or, even worse, your battery starts to flash because you forgot to charge it the night before and you have no extras on hand. It’s a simple thing I know, but one that will frustrate the pants off of you when it does, indeed, happen to you.
Keep your batteries full and your cards empty and keep both in your camera bag. Buy and keep extras of both on hand just in case because, no matter how careful one is, you never know when you’ll leave one at home and, trust me on this one, it will be at the worst possible moment. It can and will happen to everybody at least once.
Bring a tripod or a monopod
A few years ago, I was on the most westerly portion of the auto tour loop and I came across a fantastic scene. A pair of grebes were tending to a nest just a few short yards from the road but very well protected from human intrusion by the waterway it was nesting in.
The pair took turns tending to the nest. One grebe would sit on the eggs while the other would work the area for vegetation to build up the nest. It was the most fascinating scene, one I have never witnessed before in person until that day.
Well, as luck would have it, I left both my tripod and monopod home. The birds were on the wrong side of the car so a window rest did me no good and I ended up trying to shoot hand-held while standing on the side of the road.
I shake way too much now to shoot hand-held for most things and when I came home all my images were ruined because of camera shake. If I had brought a tripod, or at the very least a monopod, I could have come home with some spectacular images and video footage of this nesting pair of grebes.
(Shop Bear River Blogger's Online Store)
(T-shirts, Hoodies, Greeting Cards, Blankets)
I will admit, however, I rarely plan on using a monopod or tripod on the auto tour route because almost all of the bird images I take are from my car on a rest. As such, I almost always forget to bring them with me and there have been plenty of times it has burned me.
The only exception is when the butterflies are active on the refuge. When they are, I do try and remember to bring my monopod because that is about the only way nowadays I can photograph butterflies.
Consider the time of day
The time of day has a big part in the success I have when photographing on the refuge, especially for birds. I prefer mornings and evenings for 2 reasons.
First, the birds seem to be more active at those times and I can find more interesting action to photograph. Second, the light is far better during the first couple hours of the day and during the last couple of hours before sunset.
Some call this the “golden hours” and it is true, the lighting is so much better at these times and great lighting will even make an ordinary subject come alive.
There are times, however, when I can’t get to the refuge until noon and when the harsh sun is beating down on everything. I will still go on those days but when I do have a choice on time of day, mornings and evenings are by far the best times to go and when I get my best images.
Time of year
Spring migration is, without question, my favorite time on the refuge to visit. It not only has new birds showing up almost daily but there are no bugs to contend with, well, no biting bugs, that is.
It is also a time when most birds are actively making nests and doing courtship rituals, both of which make for great photography.
But other times of the year, actually the whole year, mind you, offers some great scenes to photograph but knowing which time of year offers what opportunities are a big help to know what to expect and plan for.
As an example, fall is when waterfowl hunting season is in effect and even though the tundra swans do migrate through the refuge at this time by the thousands, I never photograph them this time of year but wait for spring when they are much more settled down.
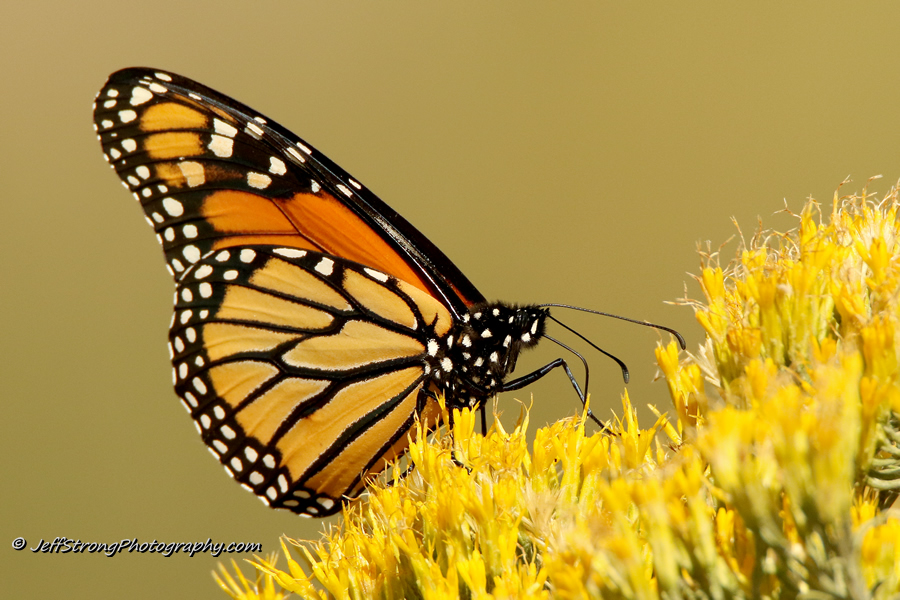
Each season offers something unique and interesting to photograph on the bird refuge. Winter is when the rough-legged hawks are in town. Summer is when baby grebes are riding on the backs of their parents. Fall is when monarch butterflies are searching the refuge for sunflowers to nectar on for their long journey south. And spring is when thousands of migrating tundra swans literally take the refuge by storm for several weeks as they work their way to the arctic tundra.
Learn what season offers which opportunities and you can always find something interesting to photograph on the refuge.

Window rest
I fought this one for years. I have always tried to shoot hand-held, even when sitting in my car, but over time I had to realize I needed some support so I caved, thusly swallowing my pride, and started to use some kind of window rest.
There are a lot of options out there but I would say from personal experience, just pick one and use it. I use a simple foam insulator for pipes pinched on my window. I have seen more elaborate setups such as window mounts or bean bags. To each their own I guess but for me simple is the way to go.
The important thing is to just have some kind of rest to stabilize your camera, especially if you’re shooting with a large lens. Every bit helps and having a rest has most certainly helped me in a huge way.
This is very true on cloudy days when you can’t get a fast enough shutter speed to shoot hand-held. A window rest will save your bacon plenty of times, to say the least, so find one you like and take it with you. I can assure you it will help. It helps me and I use it almost daily and I never leave home without one now.
Camera settings
This topic is a long blog post in and of itself but, with that said, I will give you a brief overview of the basic settings I have my camera set at for bird photography.
First, I try to shoot with as fast as a shutter speed as possible. For moving birds, I have found you need at least a 1/2000 shutter speed, preferably more in most situations, to stop motion and, in turn, get a really sharp image of a bird in flight.
I also shoot in aperture mode almost all of the time for wildlife. ( At least that is what it is called on Canon cameras so Nikon and Sony users will need to see what their aperture-controlled mode is called.) This allows me to have more control over the background and if it is blurred or not.
My preference is a smooth, blurred background so I almost always opt for a wide aperture. It gives me a lot of light to shoot fast shutter speeds and it helps soften the background the way I like.
I pre-set my ISO as well, depending on the lighting conditions of the day. I almost never shoot over 800 ISO and I only use that high of a setting if it is a cloudy day. I never let the ISO float but rather set it at a fixed level. My camera is usually set at 500 ISO most of the time when I have appropriate light and I have even been able to reduce it to as low as 400 but anything lower than 400 you probably won’t be able to get as fast as a shutter speed as you need for flying or moving birds.
My camera is also set on both burst-mode and in servo mode, meaning it can take a lot of pictures in a row with just holding down the shutter button and it will still keep focusing on the subject as it moves.
If I shoot landscapes or sunsets, I have to remember to change this last setting so my camera only takes one picture at a time but for wildlife, moving action is the name of the game so have your camera set to where it will constantly be focusing and will shoot a series of shots in a row while holding down the shutter button.
Be patient with yourself.
Honestly, patience is the number one reason why people struggle with photography. It isn’t their gear. It is their skill level or knowledge. It is their ability to sit and wait or to go out and spend the time needed to search for something cool to photograph.
Great images don’t always just happen, they have to be found most of the time. I will admit I have had some stellar images from stumbling across something spectacular accidentally but, day in and day out, it is hard work to find something of great interest to photograph.
It also takes time, a lot of time and practice, mind you, to learn the complicated world of digital cameras and outdoor photography. It can be frustrating, very frustrating at times to where you just want to quit.
This is where we need to be patient with ourselves and give ourselves time to learn, time to practice and time to grow as a photographer. Every single photographer has to go through this part. There is no way around it.
I have a simple rule about my success ratio, it’s called the one percent rule. If I come home with 1 out of 100 images that are printable I feel I had a good day. Somedays I beat it and somedays I don’t even come home with a single image worthy of the wall. But over time, if you find yourself liking only one percent of your work, you are doing well.
And to add to the rule a bit, you will find yourself deleting more images as you get better, not less. I know this sounds counter-intuitive but it’s true. Your skills will rise over time but your expectations and standards will always rise faster than your ability for some reason, causing you to be more and more selective over your images.
It’s a good thing and part of the photography process. Just keep in mind the one percent rule and you will be fine. Be patient, give yourself time, and learn to develop your own unique style for photography.
Watch both sides of the auto tour route
This is an easy one and works well with the driving slow tip. Keep your eye on both sides of the gravely auto tour route for birds and other forms of nature. I have photographed some incredible scenes just a few yards away from my vehicle.
If you drive slow, as mentioned before, many of the birds will oftentimes sit for you. I have had avocets, great blue herons, and cinnamon teal, just to name a few, sit right alongside the road and offer me incredible opportunities to photograph them up close and personal.
If I am there just to take in the scenery and enjoy the day, not looking for things to photograph, I gaze out over the marsh and enjoy just being out in nature but when it is time to get serious about photography on the refuge, my eyes are literally glued to the first few yards on each side of the road, that is where the action is going to happen.
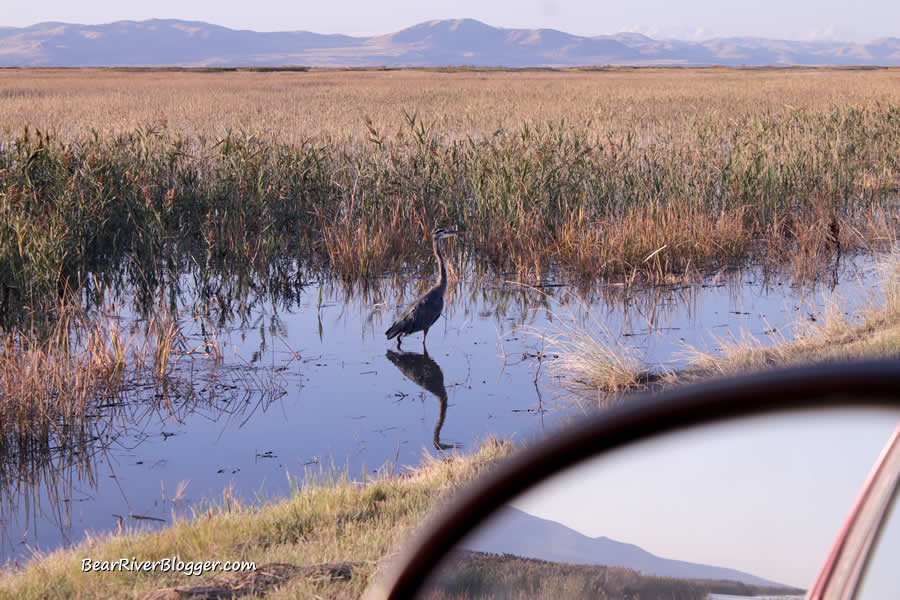
For birds, stay in the vehicle and use the car as a blind
I can’t stress this one enough if you are looking to photograph birds. Use your car as a blind, of sorts, and stay inside your vehicle. Birds are much less afraid of vehicles on the refuge then they are of humans because they see hundreds or more vehicles during the day but when someone gets out and tries to get closer, the birds get nervous and they will take off.
It is quite tempting, I will admit, to get out of the car and try to get a few yards closer but trust me, I have seen it a thousand times. When people get out of their cars, the birds will either fly off or at the very least move further way than they initially were.
Staying in your car is by far the best thing to do when trying to photograph birds on the refuge. It’s not to say you can’t or shouldn’t get out to stretch our legs or to photograph a great scene or to just enjoy the day, I do all of those as well. It is just when you’re looking for birds to photograph, stay in your vehicle and you will have a much better success rate with our avian friends. Photographing birds is hard enough as it is and staying inside your vehicle makes it a little easier.
Sit, wait, watch
This is my most favorite method of photographing on the refuge, or anywhere else for that matter, but one I don’t use very often, however. I prefer to find a spot so I can sit and, well, just wait it out. It takes a lot of patience and time, mind you, to sit in a spot and watch for hours but realistically this is how I get some of my best bird images.
The downside is, and yes, there is one, you need to have a spot picked out that will produce results. Just randomly pulling to the side of the road and sitting for hours is almost always a waste of time. This is why I don’t use this method as much as I would like.
When I do use this method, I know ahead of time what birds are in and the basic areas they will be frequenting. This increases my chances of success as opposed to the shotgun method of just picking a spot and sitting tight for several hours.
Take a test shot and check settings before you get to the refuge
I still struggle with this one I will admit. I am always excited to visit the refuge and quite often I just don’t want to take 5 minutes to check my settings and to take a test shot or two. This has burned me more times than I can remember though, especially when I was out the evening before photographing sunsets and didn’t change my camera settings back to where I need them for wildlife.
Take a few minutes and check your settings. Take a photograph or two and make sure the exposure and shutter speed is where you think you will need them. It will take a lot of headache and frustration out of the day if you do this before you come across an incredible scene and didn’t realize you had the wrong settings until you come home and look at your images.
Have your camera handy at all times
Another simple one to abide by if you are alone or if your passenger is going to do the same in the back seat is to have your camera ready and close to you in the passenger seat. I take the lens cap off and set it facing forward so all I need to do is grab it, turn it on, focus and shoot. Birds can often be quick to fly away and every second matters when trying to photograph them so just be ready and prepared by having the camera nearby in the passenger’s seat with the lens cap off all ready to go.
Pull to the side of the road for others to pass.
This is more of a courtesy tip than a photography tip but everybody out on the refuge is doing the same thing, looking for birds and enjoying their time out in nature. When you find something to photograph or just need to stop for a bit, pull to the side of the road and give other visitors room to pass by. It’s just the friendly, courteous thing to do.
I know photographers feel the need to “get the shot” from a particular angle, I too have wanted certain shots from certain angles, but at the end of the day, it makes for a much nicer experience when everybody is being courteous to everybody else while on the refuge. The auto tour route is plenty wide to pull to the side to let people go by.
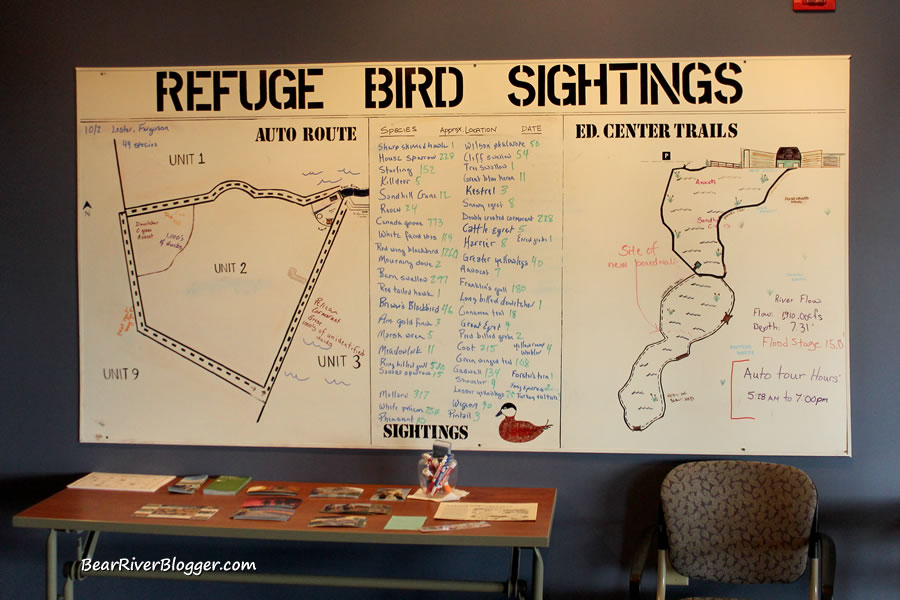
Visit or contact the refuge visitors center
The best way to know what to expect when photographing on the refuge is to talk to the people who spend their time taking care of this 77,000-acre wildlife preserve. I suggest you start your trip at the visitors center if you are there when it is normally open.
The refuge personnel and volunteers keep good tabs on which birds are currently being seen on the auto tour route. They even post the sightings on a big board inside the visitor’s center for all to see.
Shoot with lens hood when possible
Shooting with my 150-600 mm lens, I try to remember to attach the lens hood when possible. It will help with glare on the lens and it will also help keep the rain off the lens as well. It makes the whole length of the camera a bit longer so you have to be careful about bumping it into things but it is a good habit to get into if you shoot with a large lens.
Keep an open mind
Don’t have any pre-conceived expectations when photographing outdoors but rather just watch and see what comes available. Nature is nature and we can’t control what we get to photograph so keep an open mind and just look for something unique and interesting and you will find it.
Looking for specific things will often times cause you to miss other stuff you aren’t necessarily looking for. This has happened to me, especially when I have an urge to photograph something in particular. Those are quite often the times I come home with nothing and it is almost always because I didn’t keep an open mind and let nature speak to me.
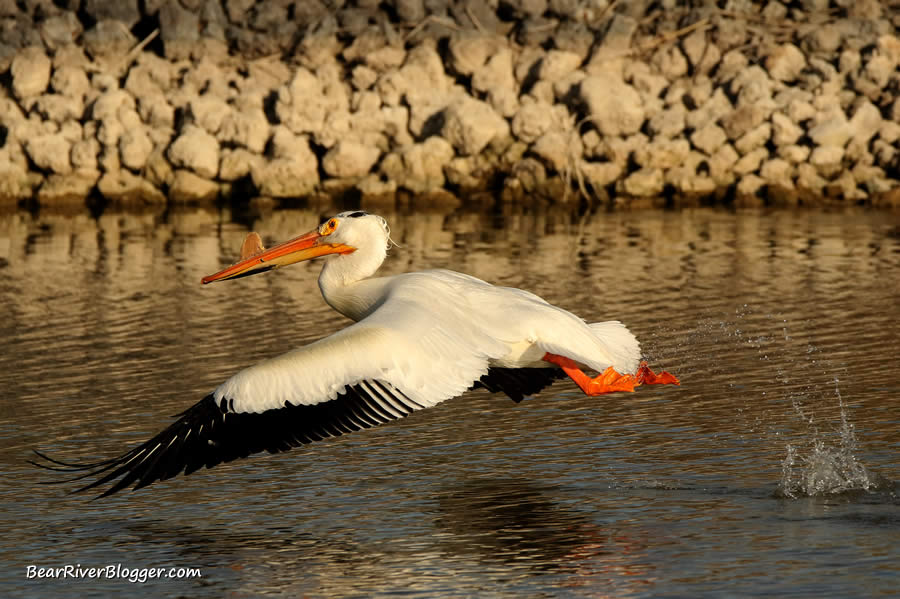
Pelicans flushing up off the water, for example, is one of my most favorite scenes to photograph on the refuge. Sometimes I will go into pelican-mode and rarely see anything else when I am looking for these orange-billed beauties to photograph. I can only shudder to think of what great scenes I have missed by not keeping my mind open to the whole world around me and just focused on one particular subject.
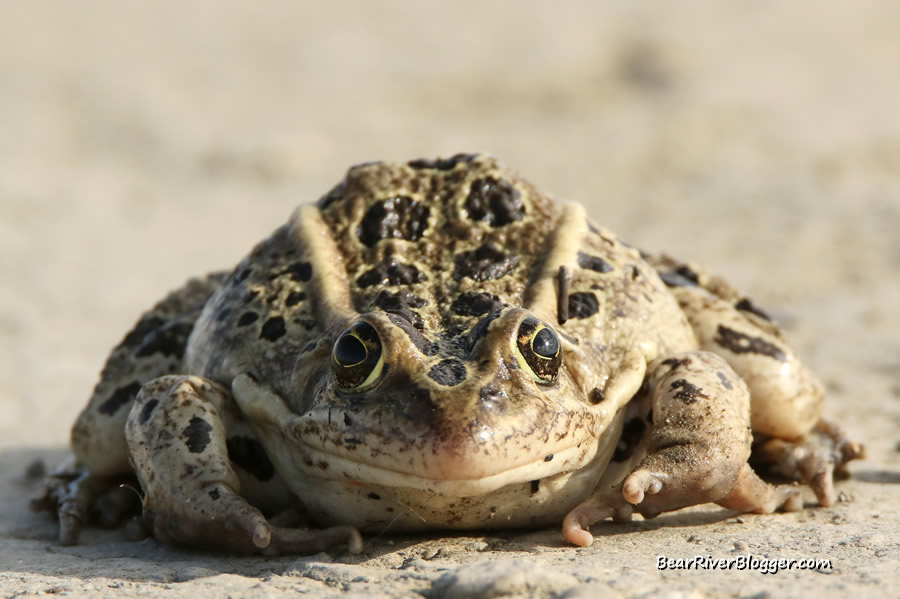
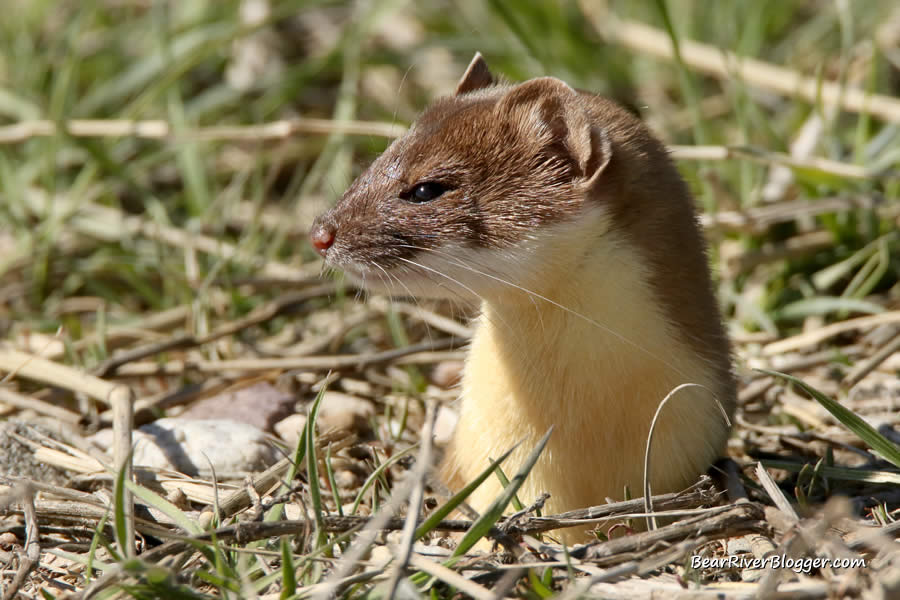
In addition to this, the refuge has so much more to offer than just birds alone. I have found butterflies, insects, snakes, deer, weasels, and some fantastic sunsets to photograph so when your out in nature with your camera, just be watchful and take what mother nature gives you. You just might be surprised by what you will find.
Listen as well as watch
This little nugget works well for smaller birds on the refuge, especially marsh wrens and song sparrows. I usually hear them well before I see them. I drive around the refuge with my window down and I am constantly listening for some of the smaller birds out there which are harder to see on their own.
Don’t just look for things to photograph with your eyes but also keep your ears open as well. Birds, songbirds, in particular, will oftentimes let you know they are around by sound long before you may actually see them.
Be observant.
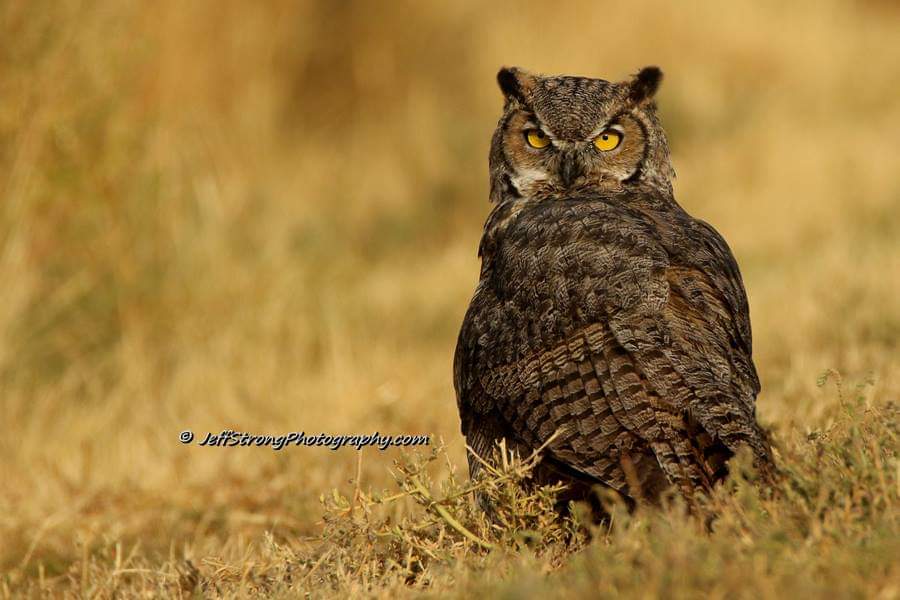
I am amazed at how people can drive by some of the most incredible things on the refuge and not even bat an eye. A few years ago, I came across a great horned owl perched just a few short yards off of the auto tour route.
It was bigger than life and I noticed it several hundred yards away. I stopped and this beautiful bird gave me quite a show, letting me take dozens of pictures of it for quite some time, all the while as people drove by not even noticing the majestic owl was just a few short yards away. The great horned owl image below was that particular owl everybody just drove on by without even a glance.
Being observant is one of the most critical parts of nature photography. Just being out in nature, by itself, isn’t enough. You have to keep your eyes and ears ready when something presents itself. This is by far the most important part of this list of tips I can give you.
You can learn the camera settings. You can learn the basic concepts of composition. You can watch your lighting and background but if you don’t stay on your toes and watch with real intent, all of those things won’t matter much because you will miss the grand opportunities nature gives us to photograph.
Conclusion
I hope this list of tips and suggestions helps you out in your nature photography efforts. Over the years, I have read many books on the subject of outdoor digital photography but they all talk about the technical side of it, the settings, the gear, and such, stuff very important by their own right but not really delving into the actual practice of getting out there and experiencing it first hand.
The gear and technical side is only part of the journey, the other half is getting out there and developing your own sense of artistry and style just by doing it. I hope in some way I have made that part of it a little easier by giving you what I have learned by going out and just doing it, over and over again until I got it right.
Take time to practice your photography. Don’t get discouraged by your bad images, use them as motivation to get better. In my photography workshops, I always stress you will learn far more from your bad images than you will from your good ones if you don’t give up and keep working at it.
Feel free to share this post with your photography friends and don’t forget to sign up for our website to receive email notifications about future blog posts. We also have a Bear River Blogger Facebook page, a Bear River Migratory Bird Refuge Facebook group as well as a budding YouTube channel.
I appreciate your readership. Thank You.

(Advertisement)